
VMWare is in the news again. I feel the next 24 months will be rough for security teams across the board. Many have spent the last year or more in lockdown refining skills and learning new ones. Cybersecurity is like locking your house; it doesn’t stop the determined, though if it’s good enough, they may move on to something easier.
In this doc, we will upgrade my lab VMWare ESXi 7.0U2 to 7.0U3c. This process should work for prior 7.x releases, as well as any subsequent releases of 7.x. Remember to read the documentation for upgrade paths. Sometimes you can’t jump to the most recent update without installing intermediate updates.
Note:
These instructions apply to the ESXi free version. If you have vSphere/vCenter, that is a much better option!
The first step is to navigate to VMWare’s labyrinth of a website and download the offline upgrade file. Head to the downloads section and look for ESXi files, specifically a file VMware-ESXi-7.0U3c-19193900-depot.zip (or whatever the latest version is).
Once you have the update file or “Depot,” you need to either upload the file to the system’s datastore or have it otherwise accessible to the host. I’ll directly upload it to the datastore for simplicity in this example.
Navigate to Storage and click on your datastore, select Datastore browser -> create or select a folder, click Upload and select the file you wish to upload from your computer.
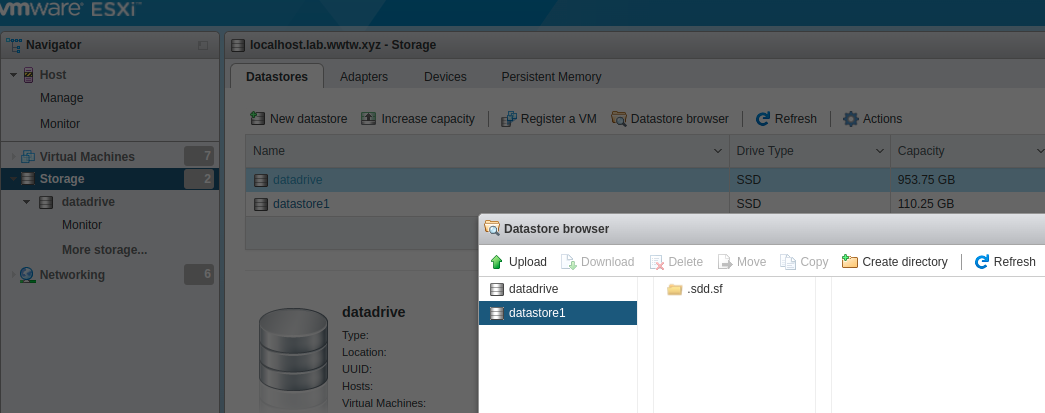 Datastore Browser
Once the file is uploaded you can exit the browser.
At this point, it would be a good idea to start shutting down all your guests.
Next, enable SSH access to the host.
Navigate to Host -> Manage -> Services -> select TSM-SSH and click Start at the top.
 Services Manager
Confirm the installed version.
1
vmware -l
Enter maintenance mode
1
esxcli system maintenanceMode set -e true
or you can go to Host -> Actions -> Maintenance Mode
 Actions Menu
Run this command to see what profiles are supported in the depot.
1
esxcli software sources profile list -d /vmfs/volumes/datadrive/Updates/VMware-ESXi-7.0U3c-19193900-depot.zip
 Upgrade Command
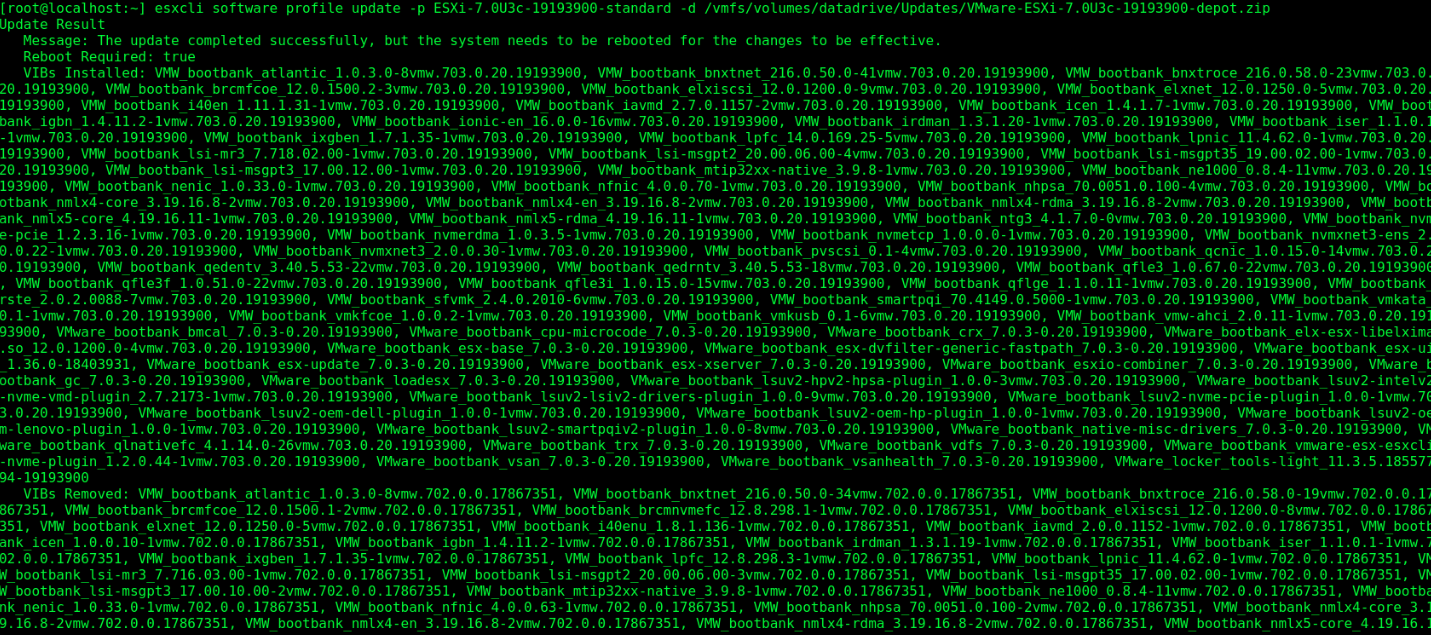
This command should check the host, verify that your system is compatible, and install the update. You should be notified of any failed checks before installation.
1
esxcli software profile update -p ESXi-7.0U3c-19193900-standard -d /vmfs/volumes/datadrive/Updates/VMware-ESXi-7.0U3c-19193900-depot.zip
You might need to apply the following if your CPU is going out of style soon.
1
--no-hardware-warning
 Upgrade Success
Once the upgrade completes, the system should return: “The update completed successfully, but the system needs to be rebooted for the changes to be effective.” You will also have a long list of VIBs installed, VIBs removed, and VIBs skipped. Verify this list is as you expected. For example, skipped VIBs might need to be manually installed from another source, depending on how or where you got the update file.
 Upgrade Success Full
1
reboot
Reboot the host to have the changes take effect.
Once the system reboots, you should expect to see the new version number under configuration.
 Verify Version Number
Start your guests and enjoy U3c! Make sure SSH is off unless you want it enabled.
Comments powered by Disqus.