
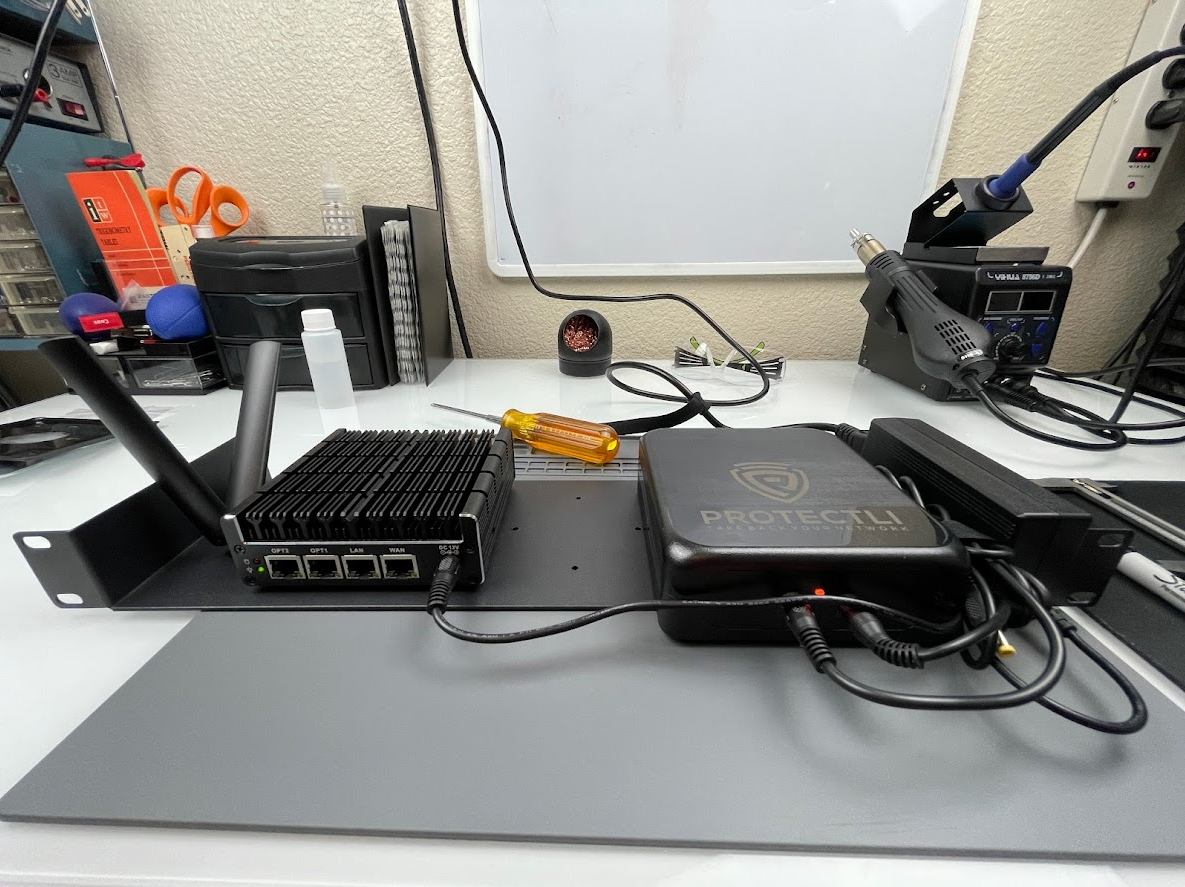
 Finished product
Overview
This is continuation of my Protectli OPNsense Router Project series. Head over to Part 1 - Project Overview for a complete overview of the project.
Picking up where we left off in Part 5 - Installing OPNsense. We have two WAN interfaces, one wired, and one LTE interface. I want this router to have the ability to swap between them as needed, but only use one at a time. This little box is getting shipped out and I’ll likely never see it again so I want it to be as stable as I can make it.
Single Gateways

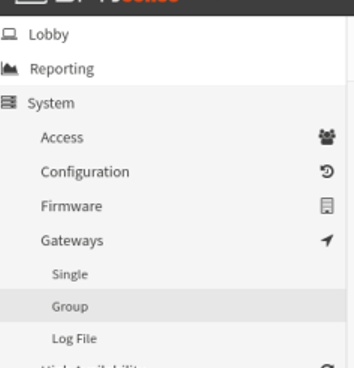
We should have connectivity for the operating system by now. Let’s set up the gateways. Afterward, we will configure the firewall to allow traffic. The OPNsense the firewall blocks everything by default. Select System, Gateways, Single.
Here you can see my two gateways. The WIREDWAN-GW is active. If you see multiple gateways listed, edit each one. If you only have one, create one by clicking the orange plus icon in the top right. Click the pencil icon on the line you want to edit one.

Change the name and description values as needed. For the monitor IP I recommend you find reliable servers to ping. Cloudflare DNS 1.1.1.1 is reliable for me. Google DNS is not. I’ll explain why you should pick DNS servers below.
Note:
We use public IP addresses for the monitor IP because the firewall needs to know if the local connectivity is up. If we use an internal DNS IP address problems will arise before and after the VPN is established. Google DNS is unreliable for ICMP per Google DNS documentation.
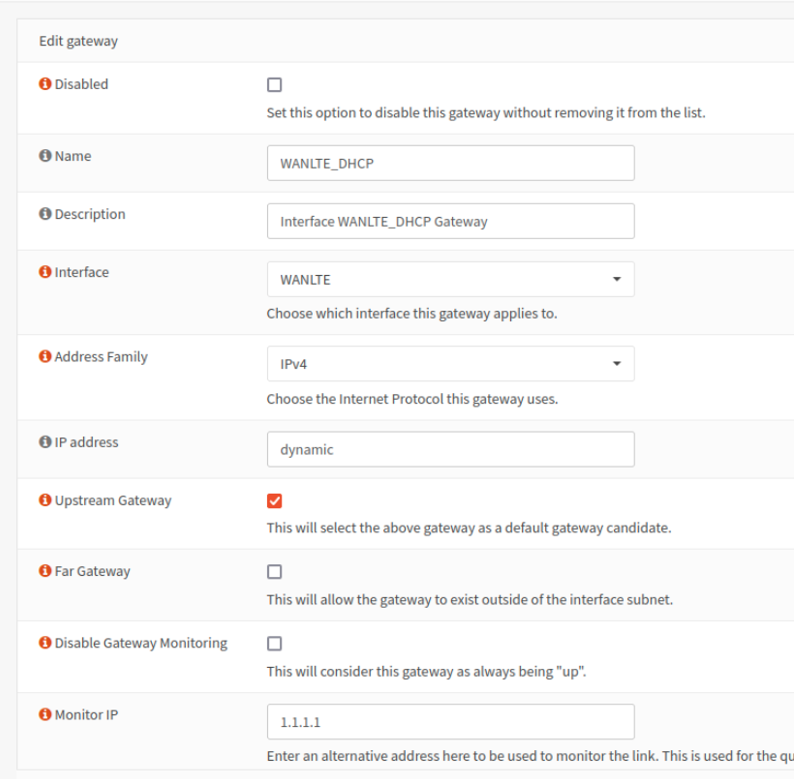
I use these settings for LTE or any other unreliable link. Let’s walk through these settings.
- Disabled - Disables the gateway, unchecked.
- Interface - Sets the interface this gateway is connected to. Unless you know what you’re doing, always set the interface to one of your WAN ports. Configure one gateway per WAN connection.
- Address Family - For me this box is for monitoring devices that don’t support IPv6. I’ll be selecting IPv4 only.
- IP address - Leave this dynamic unless you know why you need to change it. The IP must reside in a subnet directly connected to the interface unless you’re doing fancy things.
- Upstream Gateway - Says this can be a default gateway. Route table stuff, check the box.
- Far Gateway - Likely not for you. If it is, you know what to put here. This is the “I’m doing fancy things above” check box.
- Disable Gateway Monitoring - We don’t want this. If you select this option your router will consider your gateway to always be working great and Multi-WAN won’t see failures. If your ISP goes down, the router will continue to blindly forward traffic to a black-hole if you check this.
- Disable Host Route - Don’t select this either, routes are good for routers. Unless you’re a control freak or you’re doing fancy things still.
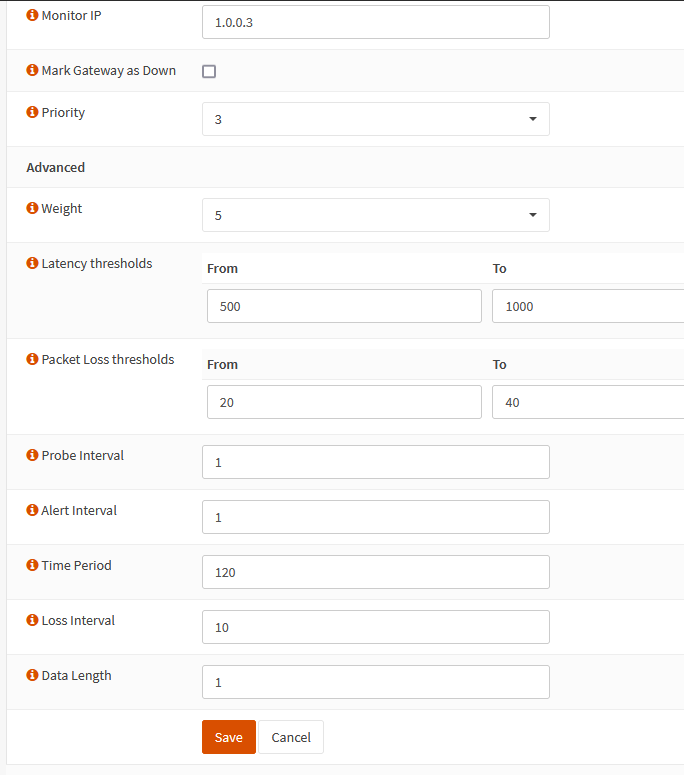
- Monitor IP - This is the IP used for calculating the link quality. Enter a DNS server here. We use DNS servers because later we’re going to tell the system to send traffic out a specific gateway for each monitor IP.
- Mark Gateway as Down - This is great for troubleshooting. This marks the gateway as down regardless of the monitoring.
- Priority - Lower is more important. I set my wired connection to 1 and LTE to 3.
- Weight - Another value in the gateway priority calculation and is used for unequal balancing. Links with higher bandwidth should get lower numbers so they get more traffic.
- Latency thresholds - This will take some tuning. I use 500/1000 on LTE and 100/300 on wired interfaces. If you set these too low the system might mark the interface down when the latency is high but not enough to cause a problem. Think a saturated link causing high latency. The low number is a warning, the high is where we consider it down.
- Packet Loss thresholds - This will take some tuning too. I use 20/40 on LTE and 10/40 on wired interfaces. If you set these too low the system might mark the interface down when the loss is high for only a short time. The low number is a warning, the high is where we consider it down.
- Probe Interval - How often a ping is sent to the monitor IP address.
- Alert Interval - The time interval for the system to check for an alert condition. This needs to be equal or greater than the probe interval.
- Time Period - The amount of time over which pings are averaged. A longer period means it will take more time to trigger an alarm. This might be needed if you have erratic ping times.
- Loss Interval - Time before packets are treated as lost in sec. This must be greater than or equal Latency Threshold.
- Data Length - This allows you to a non zero payload size for dpinger. Just set this to 1 and it should cover most compatibility issues.
Click Save.
Create/edit another interface. These settings are slightly different for a wired connection. I use the default latency, loss, and timer values under advanced for wired connections. The only exception is Data Length should be specified as 1 for all gateways.
- Change the name and description.
- Set the alternate or WIREDWAN interface.
- Use a different monitor IP 1.0.0.1
- Set the Priority to be higher if you prefer this gateway over the other.
- 1 is more important than 10
- Weight sets the gateway switching preference
- 1 is more important than 5
Tip:
Write down the monitor IP you use for each interface. We will need this information later.
Both gateways should show Online. Let’s move on to enabling gateway switching.
Gateway Groups
Click System, Gateway, Group
Add a new gateway group. To create click the add button, orange plus icon on the top right.
Set the primary, or the gateway you prefer to carry the traffic should both links be up, as Tier 1. The other as Tier 2. Use packet loss or high latency. This will fail over if the link hits the thresholds we set on the gateway configuration page. Click save.

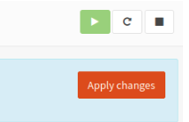
Click apply changes.
You should see your new group. We will enable use of the group next.

Click System, settings, general. While here you can change the system name, domain, and time zone.
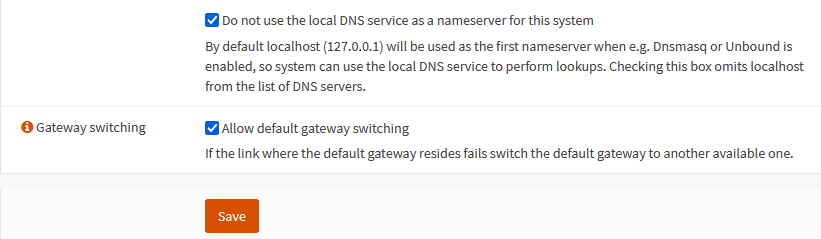
Set the DNS servers to use the gateway you set as the monitor IP when configuring the interface. Be sure to use the same gateway you used for the monitor IP on that interface. Do not use an internal IP addresses or something on either VPN network for DNS. You MUST use the same IP address you used in the monitor IP box per interface.

Scroll down and check the last two boxes. Click save.
Note:
If you don’t select Default Gateway Switching local generated traffic will only use the current default gateway which will not change without this option.
Testing
You can test failover now, pull the plug on one of your connections. You should see the gateway marked down. Once you plug it back in the system should switch back to the gateway you set as priority 1.
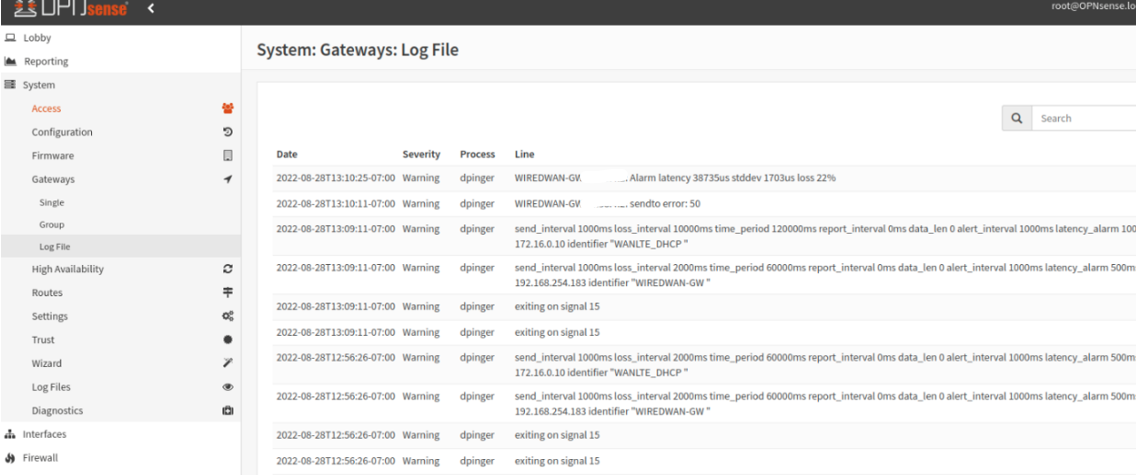
You can find more data in the gateways log in System, Gateways, Logs.
Enough rambles, I’ll pick it up in another post.
Comments powered by Disqus.